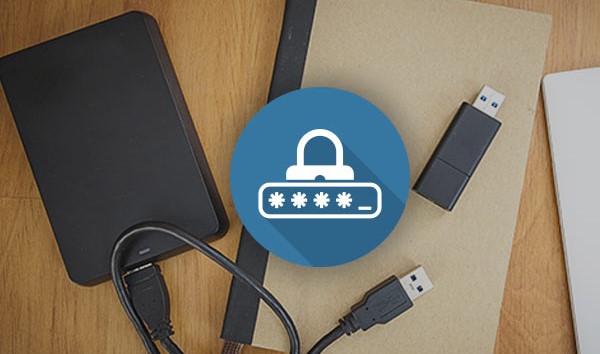
Almost everyone uses external hard drives. They are portable and allow you to store additional files; however, have you thought about keeping your hard drive protected, though? If you keep your computer and phone locked, you must password protect an external hard drive on Mac and Windows. In addition, it’s a good practice to keep every device, be it an external hard drive, files in your computer, or your phone, password-protected to prevent unauthorized people from gaining access to these devices.
So, to help you password protect an external hard drive in Windows 10, we have prepared this guide that will teach you how to password-protect an external hard drive conveniently.
Table of Contents
With BitLocker
If you want to know how to password-protect an external hard drive, the first way to do that is by using BitLocker. BitLocker makes encrypting a hard drive convenient. This section will let you walk through the steps that you need to follow. The BitLocker tool is available for Windows 7, Enterprise, Ultimate, Windows 8, 8.1, Enterprise, and Pro, Windows 10, Education, Enterprise, Pro, and Windows Server 2008 and later versions.
Step 1: Connect your device to the computer.
Step 2: Right-click on the hard drive, and you will see a pop-up menu. Please, click on the option that says “Turn on BitLocker.”

Step 3: Once you do that, you will have to create a password. Check the box that says “use a password to unlock the drive.”
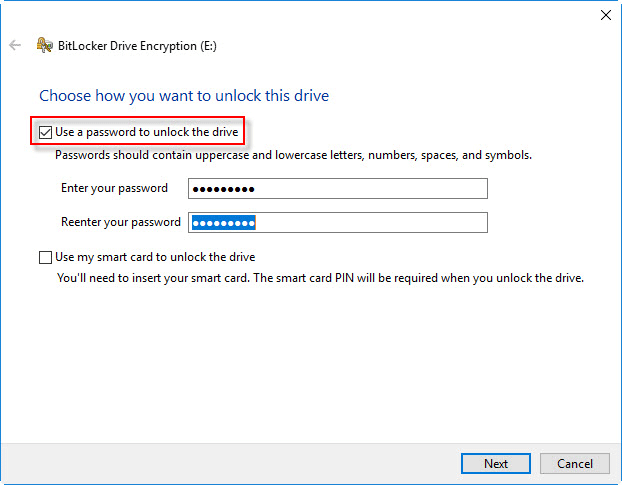
Step 4: Below that, you will have to enter a strong password on the dialogue box twice. Once done, please click on the next option.
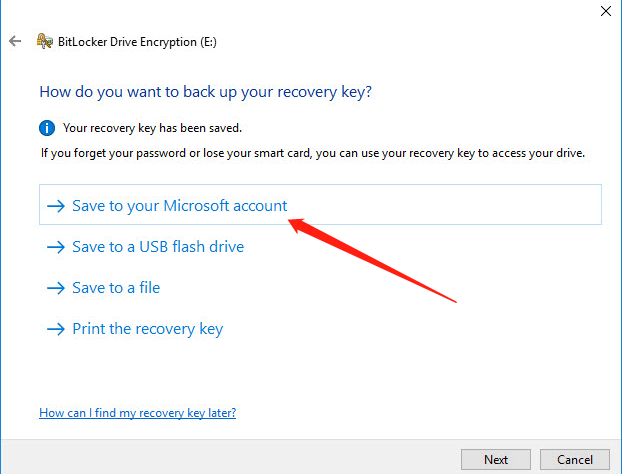
Step 5: The next page will ask you to choose a way to save your recovery key. Windows will automatically create a backup recovery key. Next, you can choose one of the options that you see on the window.
Step 6: Then, click on the next option and select a compatible mood.
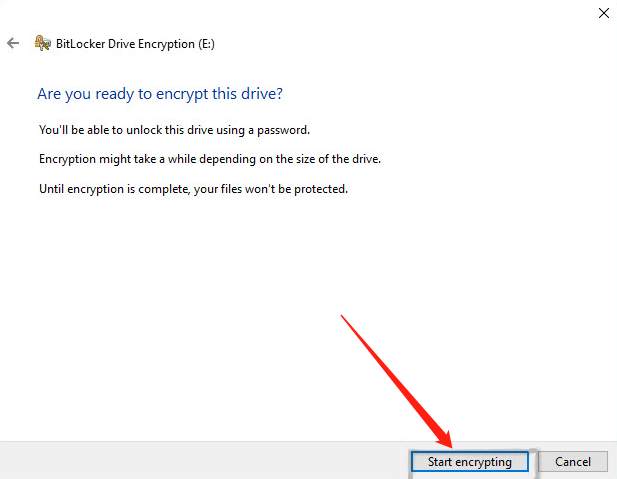
Step 7: Once done, you need to hit the Start Encrypting option to begin the encryption process, and that’s it.
With VeraCrypt
There is another way to password-protect an external hard drive, which is by using third-party software called VeraCrypt. VeraCrypt is a free tool and allows you to add a password to your hard drive without any hassle. Yes, there are a few steps that you will have to follow, but once you begin following the steps, you will find the steps easy to do.
Here’s what you need to do:
Step 1: Visit the official website to download VeraCrypt on your computer. Once downloaded, let it get installed. Then, launch VeraCrypt to start using it. Also, don’t forget to connect your hard drive to the computer.
Step 2: Once you launch VeraCrypt, you need to click on the option that says “Create Volume.” Then, click on the Encrypt a non-system partition/drive option followed by the Next option.
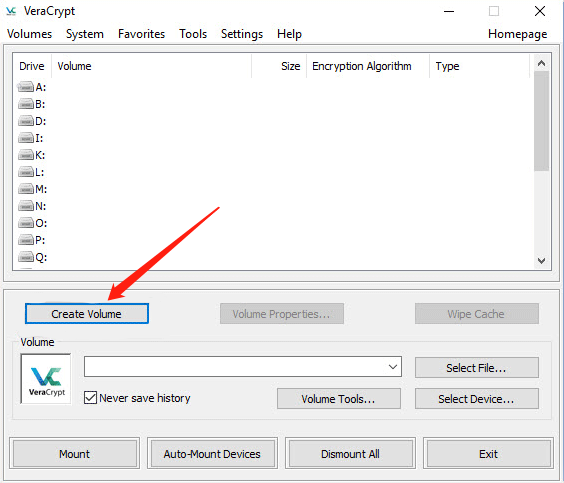
Step 3: Now, you need to click on the Standard VeraCrypt volume option. Click on the Next option and hit the Select Device option. Now, select your external hard drive and hit the OK option. Then, click on the Next option.

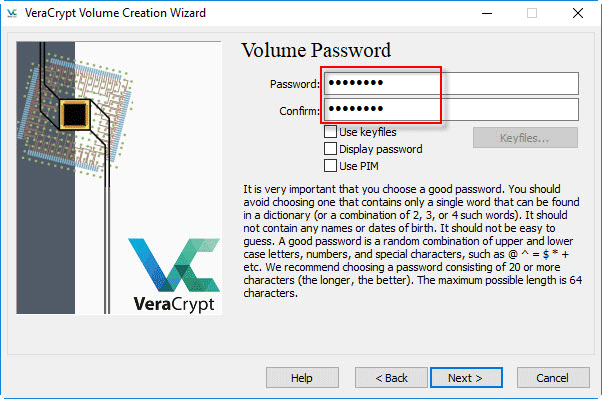
Step 4: Select the Encrypt partition in place option, and click on Next. Once you see the Volume Password page, enter a strong password twice, and hit the Next option.
Step 5: Now, click on the Encrypt option to begin the encryption process, and it will encrypt folders and files in your hard drive.
The Best Tool to Protect External Hard Drive with Password
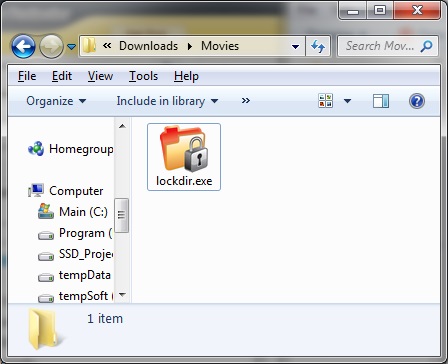
Although the steps to follow to use BitLocker and VeraCrypt are easy, if you want to try a better tool to lock your external hard drive, you can try KakaSoft’s Folder Protector (LockDir). LockDir is a robust and professional tool that can lock hard drives fast and securely. In addition, you can use it to password protect folders and files. Moreover, LockDir can password-protect all types of mobile storage devices.
If you keep confidential data and files on your hard drive, better to keep them protected from unauthorized access and use. Once you lock your external hard drive using LockDir, the files inside will become inaccessible and unmovable. To start using LockDir, here are the steps that you will have to take care of. But before you start using it, ensure to download LockDir and install it, now follow this guide:
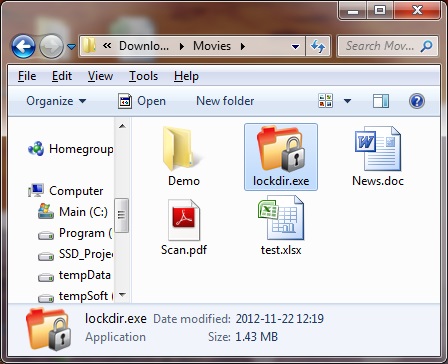
Step 1: Copy lockdir.exe and paste it to the hard drive to lock all the files; else, paste it into the folder that you want to keep locked.
Step 2: Right-click on the file or folder to lock it. You will be taken to a Folder Protector page where you will be asked to enter a password. Ensure that the password is strong and enter it twice.
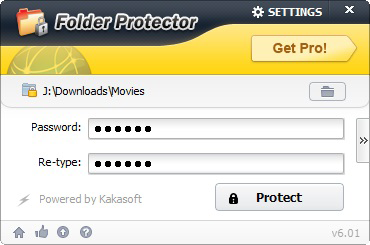
Step 3: Now, you need to click on the “>>” icon that you see to the right. Here, you need to add a password hint that will help you remember the password. Provide the tool with your email address so that you can easily retrieve the password if you forget it.
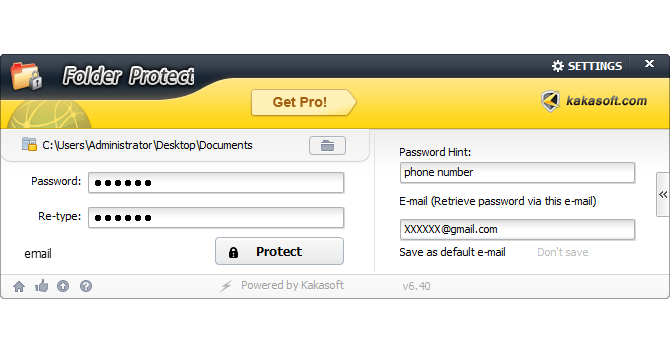
Step 4: After everything is done, please click on the Protect button. Your files and folders will be kept hidden from unauthorized access.
How to Password Protect External Hard Drive on Mac?
If you have a Mac computer instead of Windows 10, you can use your Mac computer to password-protect your external hard drive. You can use the Disk Utility tool on your Mac to password-protect the external hard drive. However, there’s one thing that you need to keep in mind. When you use the Disk Utility tool, it will erase all the files and folders that are there in the external hard drive.
Hence, use this method if you have a new external hard drive. The way it will work is that it will create multiple partitions and will encrypt each partition. To use Disk Utility, here are the steps that you will have to take care of:
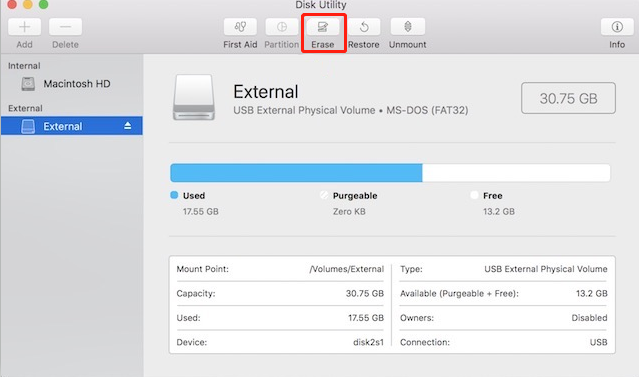
Step 1: Go to Spotlight and search for the Disk Utility tool. Alternatively, you can go to Finder, click on the Applications option, locate Utilities, click on it, search for Disk Utility, and tap on it.
Step 2: Once done, you will see your external hard drive in the left of the Disk Utility window. Please select that. Now, click on the Erase option. Please ensure that you have removed all the files from your external hard drive before doing this step.
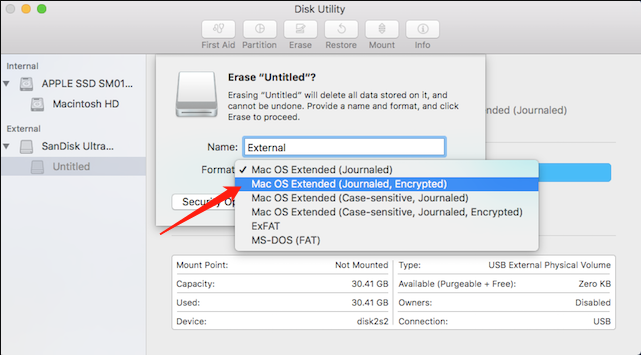
Step 3: You will be asked to add a name to the drive. Please do that, and select the Format option. Then, from the down-down menu, you will have to choose the option that says Mac OS Extended (Journaled, Encrypted).
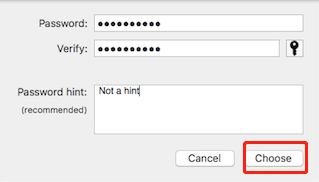
Step 4: Here, you will be asked to enter a password. Please enter your password twice, and hit the Choose option.
After following all the steps, your external hard drive will be encrypted.
Sum Up
You have finally learned different ways to password-protect external hard drives. We hope this guide will turn out to be helpful, and you will be able to add a password to your external hard drive using Mac or Windows. Also, don’t forget to download LockDir by KakaSoft if you want professional and high-level encryption.