There are plenty of reasons why you will want to keep your hard drive hidden from unauthorized access. When the hard drive is hidden, it becomes invisible for others to go through the folders since everything inside the drive is hidden. No one will be able to see what is stored inside the hard drive unless the person who has kept the hard drive hidden gives another person the access to see what’s inside.
One of the main reasons why you should hide the hard drive of Windows 10/7 is to keep the content inside the hard drive safe from unauthorized moving around, deleting, and changing. Moreover, keeping the hard drive hidden for other users makes sense if your hard drive has confidential and sensitive data. This article has prepared a few robust methods to help you hide your hard drive the right way. So, keep reading to learn how to hide a hard drive from us here.
Table of Contents
Easiest Way to Hide Hard Drive on Windows 10
If you are thinking about hidden disks, think about the easiest way to hide system drives. You can secure your hard disks by using the best and the most convenient Advanced Folder Encryption by KakaSoft. It’s an all-in-one folder lock tool that can hide disk drives seamlessly. To use Advanced Folder Encryption, you don’t need to be a tech-savvy person. There are just a few steps that you will have to take care of, and you will be able to lock your hard drive.
Key Features of Advanced Folder Encryption:
- It can lock hard drives in just a few seconds.
- It uses a secured and robust encryption algorithm.
- It supports the deletion and shredding of files.
- It password-protects folders and files.
- It supports Windows 10,7,8 and XP.
- It can encrypt files in batches.
How to Use Advanced Folder Encryption?
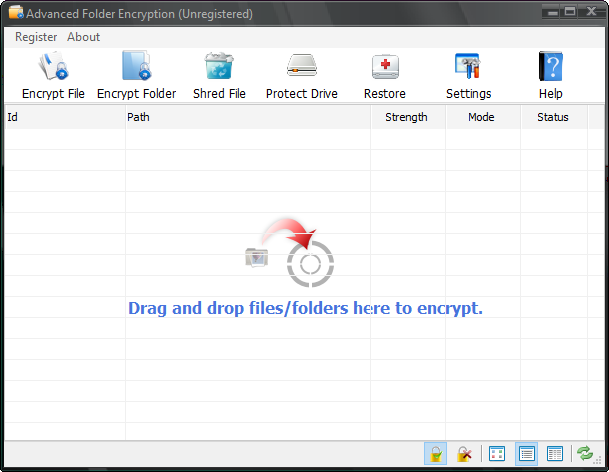
Step 1: Download Advanced Folder Encryption and launch it. Now, select the tab that says Protect Drive.
Step 2: You will see the hard drives; select the ones that you want to lock.
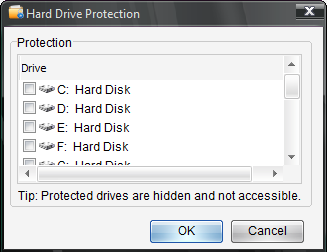
Step 3: Once done, go to “My Computer,” and you will see that the hard drives are hidden.
Hide Lock Drives Using Registry
For the second method, you can try using Windows Registry to hide hard drives. Please note that editing the registry is risky, and if you fail to do it correctly, it can cause irreparable damage. Therefore, be cautious about it. Ensure to create a full backup of the computer. Once done, proceed with the following steps:
Step 1: Launch your computer and press Windows Key + R on the keyboard. This will open the Run command.
Step 2: Now, type Regedit and then press the Enter key on the keyboard. This will open the registry.
Step 3: You will have to go to the following path:
HKEY_LOCAL_MACHINE\Software\Microsoft\Windows\CurrentVersion\Policies\ Explorer
Step 4: Right-click on it once done, and then hit the New option followed by DWORD Value (32-bit).
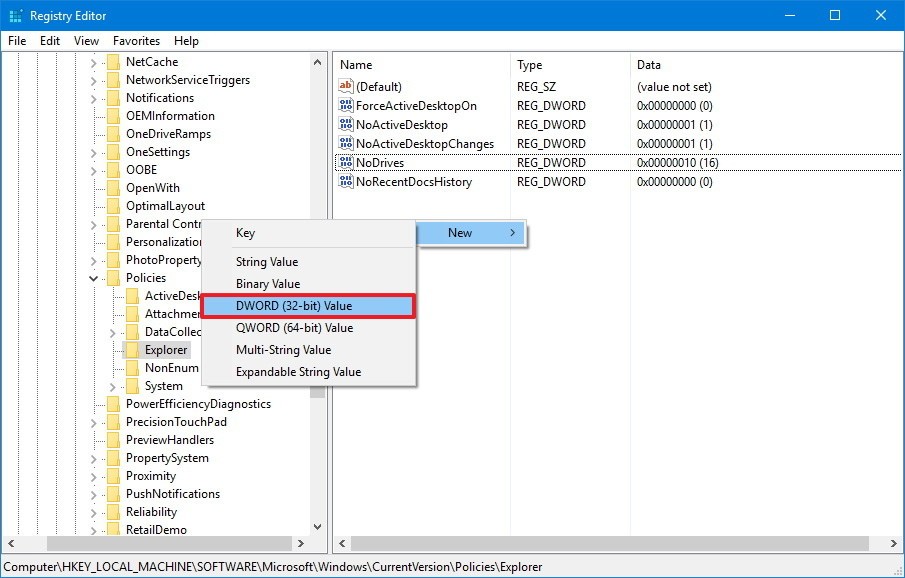
Step 5: Give a name to the new DWORD NoDrives. After that, hit the Enter option and double-click on it.
Step 6: You will see the base option; there, you need to choose the Decimal option.
Step 7: When you see the Value Data, there you need to put the decimal number that signifies the drive letter. If you want to hide multiple drives, put the decimal number of one drive, then add + followed by the decimal number of the next drive.
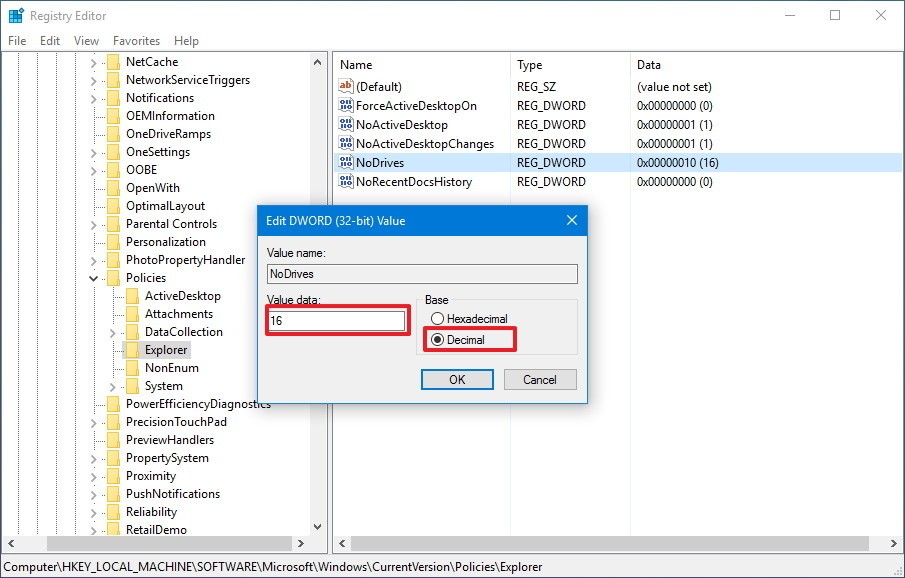
Step 8: Click on the OK option and close the registry. Go on and restart your computer, and you will see the hard drives hidden.
Hide System Drive Using Group Policy
For those who are using Windows Education, Enterprise, and 10 Pro, you can use the Group Policy to hide the hard drives. Here are the steps that you will have to follow to hide drive-through GPO.
Step 1: Launch your computer and enter the Windows key + R keys on the keyboard. Now, open Group Policy Editor.
Step 2: Once it’s opened, you need to type gpedit.msc. Hit the OK option. After that, browse this path:
User Configuration > Administrative Templates > Windows Components > File Explorer
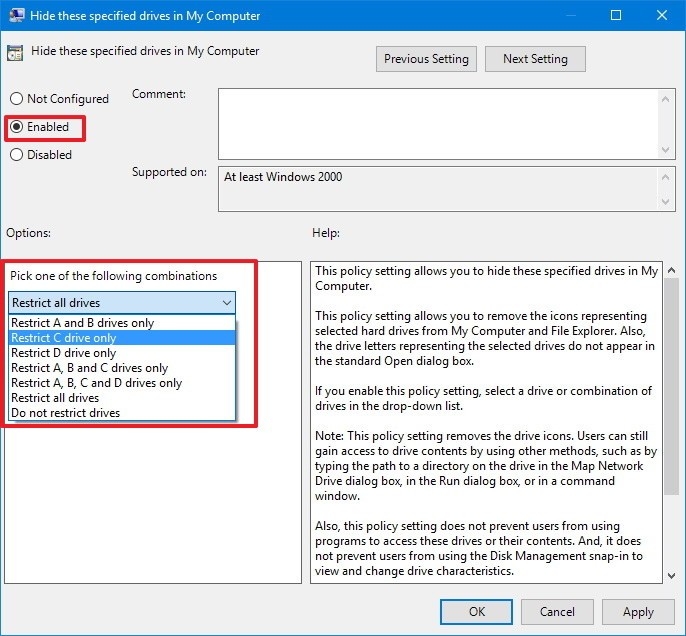
Step 3: You will Hide these specified drives in My Computer. Please double-click on that.
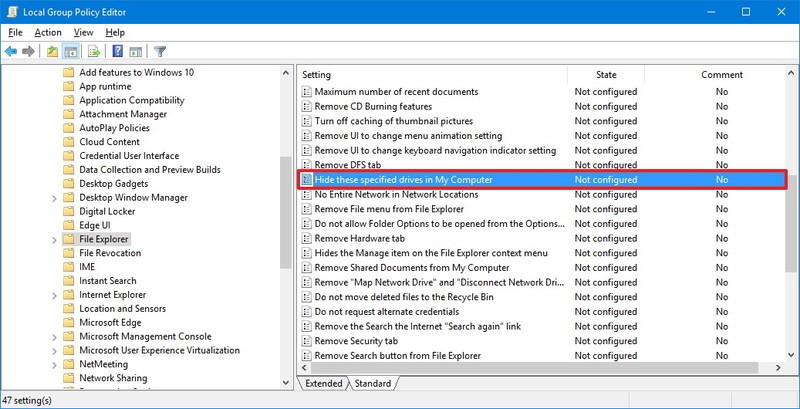
Step 4: Click on the Enabled option, and under “Options,” enter the drive combination you want to hide. Then click on the Apply option, and finally, click on the OK option.
Using Disk Management
Here’s another easy way to hide hard drives in your PC. Use the Disk Management feature of Windows and keep your hard drives hidden. Don’t know how to do that, follow these steps:
Step 1: Launch your computer and enter the Windows key + X keys on the keyboard. Now, select the Disk option.
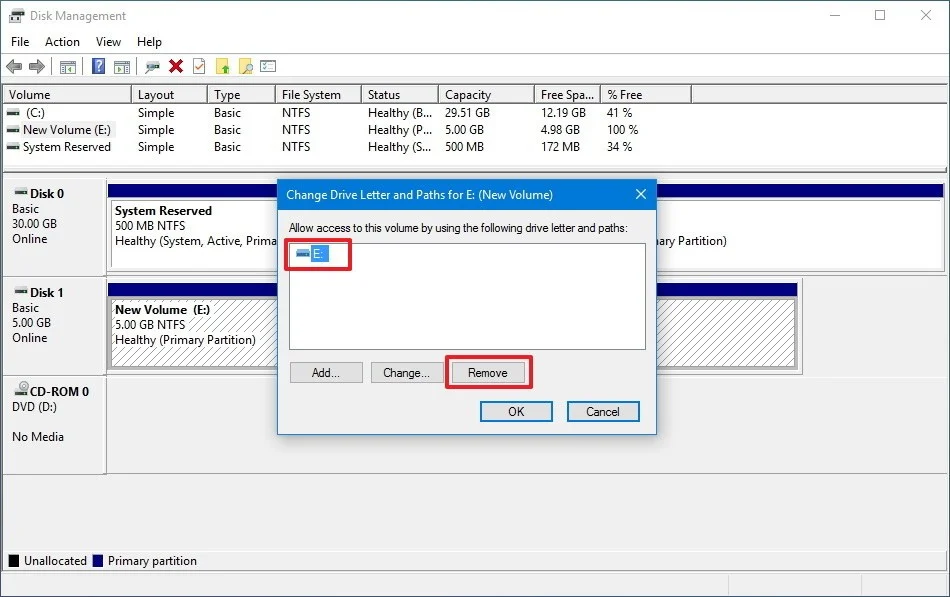
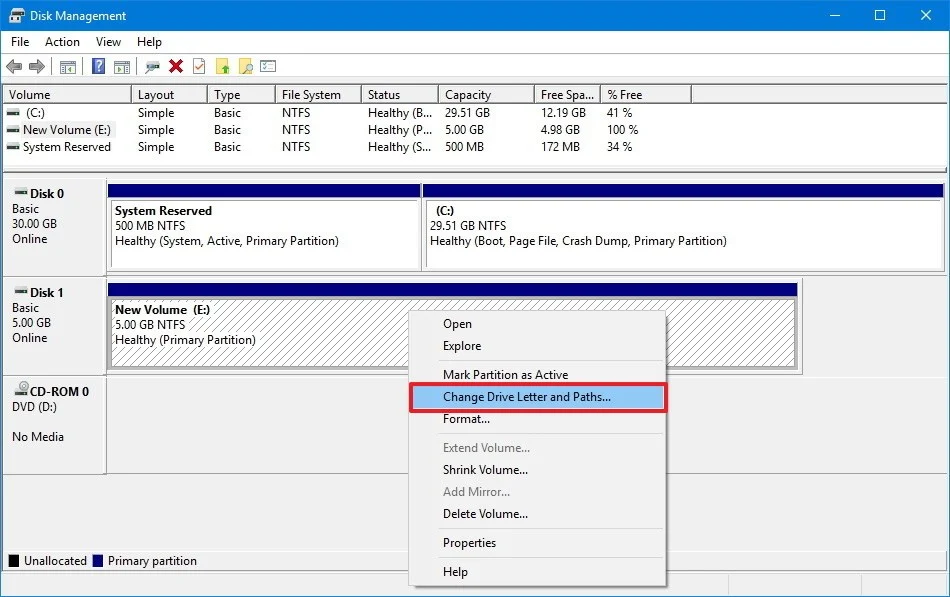
Step 2: After you find the drive you want to hide, right-click on it and select the option that says “Change Drive Letter and Paths.”

Step 3: Now, choose the drive letter and hit the Remove tab. Once done, click on the OK option to confirm the changes.
Step 4: You will have to right-click on the same drive once again and then choose the option that says “Change Drive Letter and Paths.” After that, click on the Add tab.
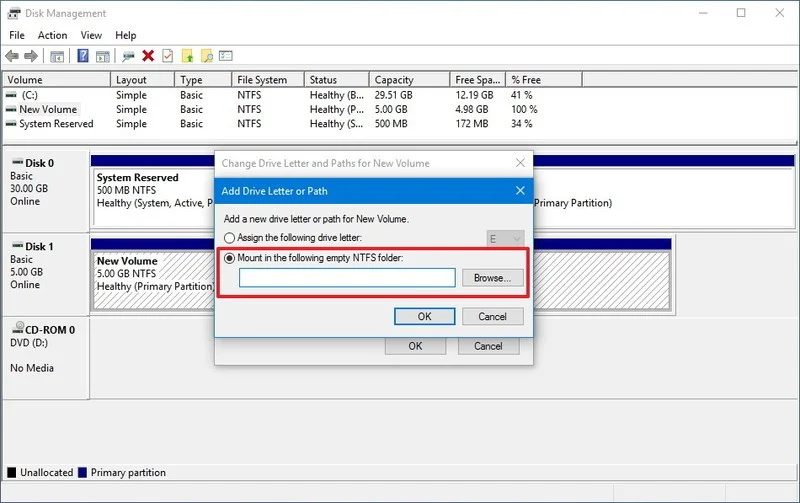
Step 5: You will see the Mount in the following empty NTFS folder option; please select that and then hit the Browse option.
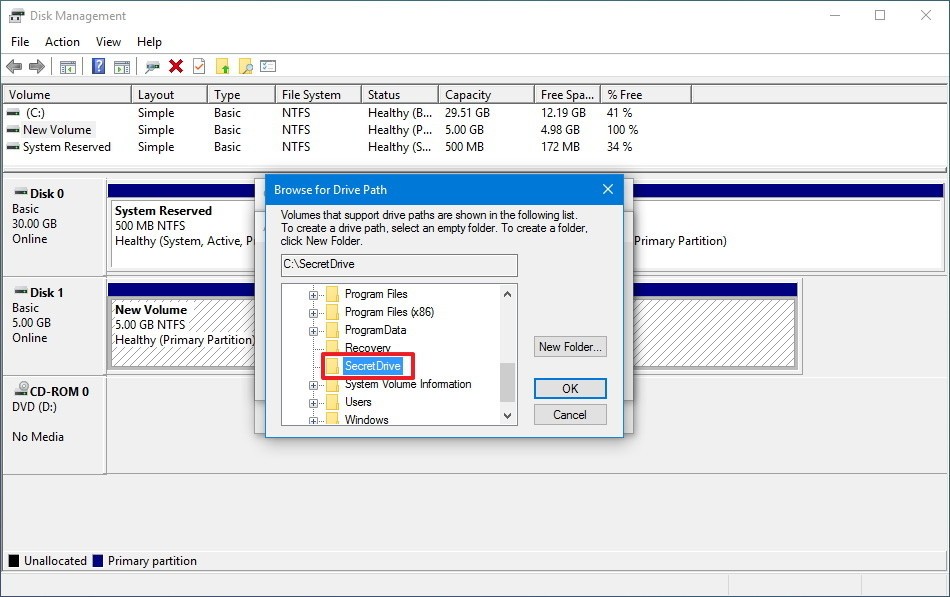
Step 6: You will have to choose the location for the mount point. Click on the New Folder option and type the descriptive name you want to give to the folder.
Step 7: Now, select the folder you have just created, and click on the OK option. Then, click o the OK option.
Step 8: Enter Windows key + I option to open the File Explorer. Go to the path that you have stated as a mount point and right-click on it. Now, click on the Properties option.
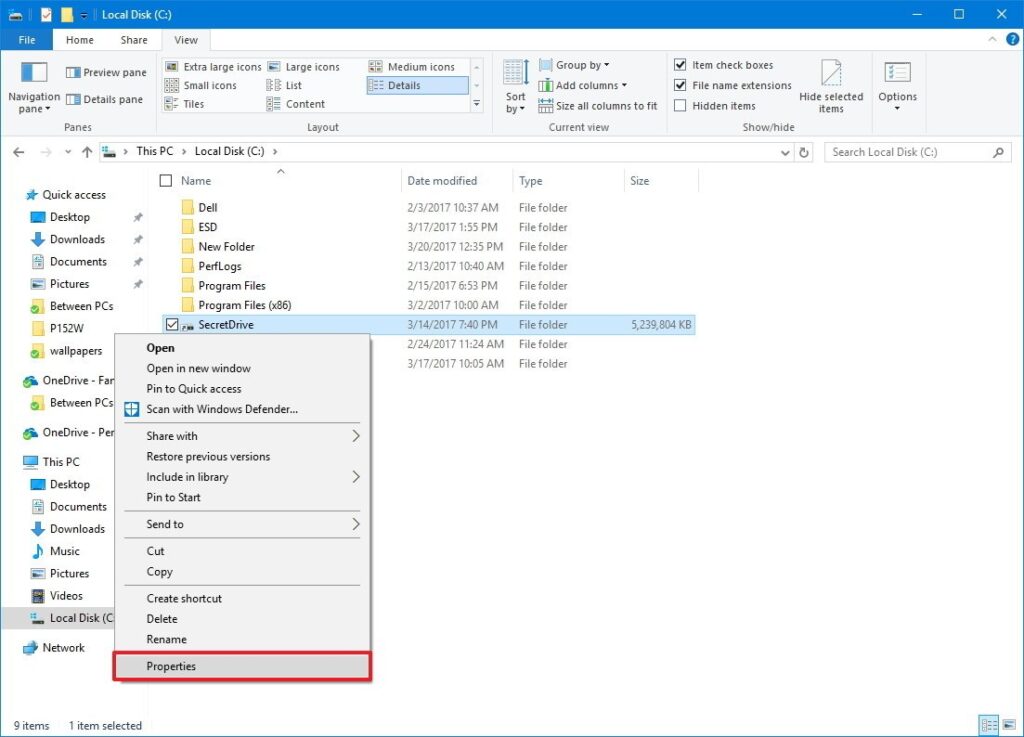
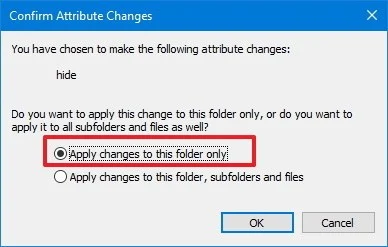
Step 9: Once the Property page opens, click on the Hidden option and then hit the Apply option. Now, click on the option that says, “Apply changes to this folder only.” Click on OK twice.
Bonus Tip: How to Hide Drive Letters?
Whenever you open the hard drive, you will see the name of the drives. It can either be represented as a letter or name that you have given. If you don’t want anyone to see the drive letters, you can hide them too. The steps to follow are relatively easy. Just make sure to follow the steps that we have mentioned below:
Step 1: Open the Folder options and click on the View tab.
Step 2: Once there, go to the Advanced settings.
Step 3: You will see a checkbox beside Show Drive Letters.
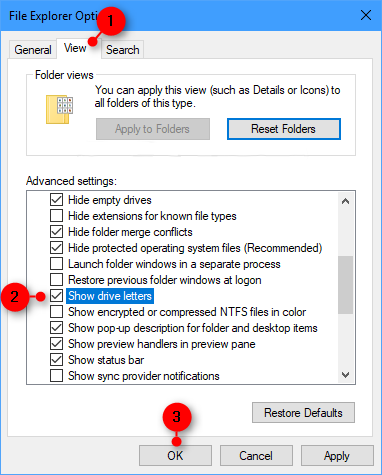
Step 4: The checkbox will be ticked. You need to untick it and hit the Apply option.
And that’s about it. Just by following a few steps, the Drive letter will be hidden.
Sum Up
Whether you want to hide a DVD drive or any other drive of your computer, now you know how to do that. Keeping your drives protected and safe is important because you don’t want anyone to damage the files and folders inside those drives. This becomes even more important if you have important, confidential, and sensitive data. So, try one of the methods and keep everything protected.