All the folders and files that you have on Windows 10 come with permission attributes. This permission allows you to modify, execute, write, read, and edit the file and folder. If you want to change the Windows files permissions, you can do that easily if you know the right methods.
If you are the admin user, you can do anything to the files and folders; however, if a standard user tries to use the files, they will have limited changing abilities. For example, they may have read permissions but not written permissions. So, let’s learn about the different permissions and how to change file permission in Windows 10 efficiently.
Table of Contents
Types of Windows Users and Permissions
Before learning how to change file permission in Windows 10, learn about the different permission types that are there. There are six types of permission types:
Full Control: This permission allows users to view folders and subfolders, open subfolders, view data inside the folder, add, change, and delete the files and folder. Users can alter the permission and even take ownership.
Modify: This permission allows users to view folders and subfolders, open the subfolder and view data, add, change, delete, and open and change files.
Read & Execute: Users will be able to view the files and subfolders, navigate them, run applications, and run data.
List of Folder Content: This will allow users to view subfolders and file names, navigate to folders, and view folders only. One won’t get to access the files, though.
Read: Users can view the subfolders and files names, open files, navigate to subfolders, and view or copy the data.
Write: This option will let users create, add, and delete files only.
And when it comes to the types of users, there are two:
Local User Accounts: This one includes guest account, children, standard users, and administrator.
Local System Accounts: Any account that has a name, for example, Local services, Network service, System.
Change File/Folder Permissions You Own on Windows 10
If you are the owner of Windows 10 and you want to change file/folder permissions to windows 10 windows file permissions, this section will help you understand how to do that. You can do that easily by following the steps that we have mentioned below.
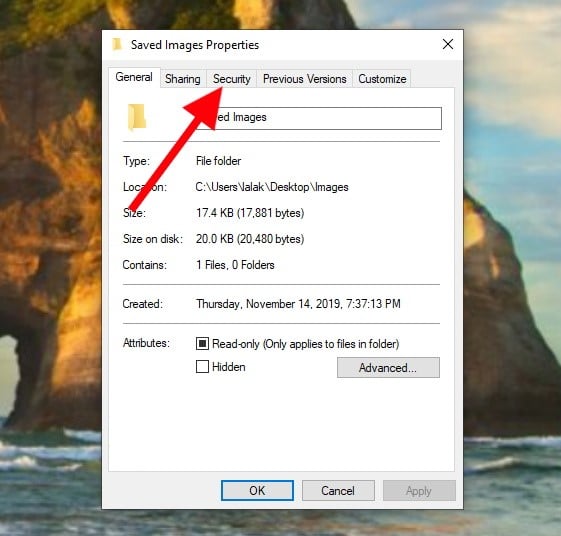
Step 1: Launch your computer and find the folder and file you want to change the permission. Once you find it, right-click on it. Then, select Properties.

Step 2: When the Properties window opens, please click on the Security tab. Now, click on the Edit option to change the permission.
Step 3: Select a user and then add the missing permissions. There will be a few boxes that you can check to choose the type of permission you want. For example, you can select file access permissions or others.
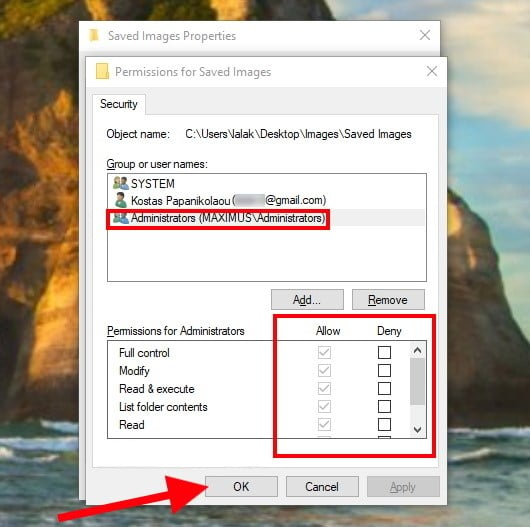
Step 4: Click on the OK option when you are done and finally, hit the Apply option.
Can I Set File/Folder Permissions I Don’t Own on Windows 10?
Let’s say you don’t own a folder or files of a computer but want to change the permission. Well, in this case, only the admin can give you permission. So, the admin will have to go through the following steps to change the permission:
Step 1: Launch the computer and right-click on the folder and file. Once done, from the menu, choose Properties.
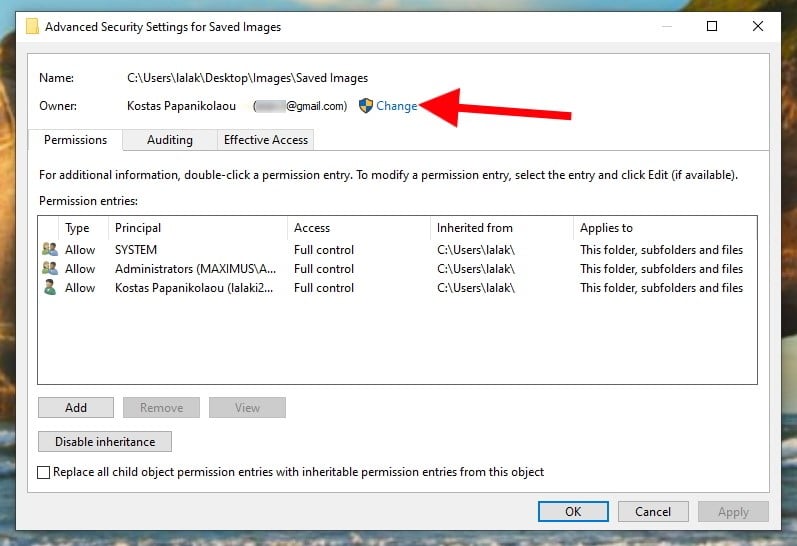
Step 2: Once you see the Properties window, please select the Security tab. Then, click on the Advanced option. After that, you need to click on the Change option.
Step 3: Select the option that says, “Replace owner on sub containers and object.” Once done, click on the Apply option. Then, click on the OK option.
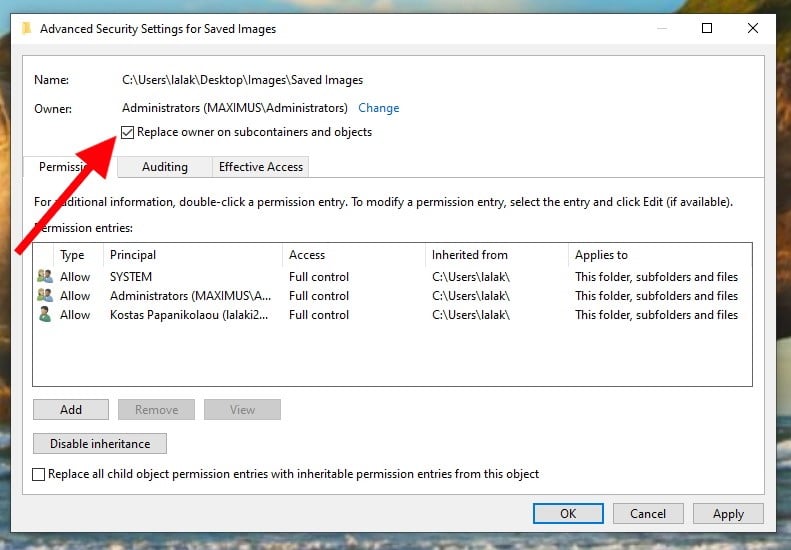
Step 4: Yet again, click on the Advanced option. To inherit permission, you need to click on the option that says Change Permission.
Step 5: Once you do that, select the Enable Inheritance option and then click on the Add option. After that, you need to choose the option that says Select a Principal. Now, type the name of the Object.
Step 6: You will be able to enable the Basic Permission. In case you want to enable the advanced permission, please select the Show advanced permissions option. Once done, click on the OK option. And that’s it.
How to Take Windows Ownership & Permissions You Don’t Own?
If you want to change the ownership and permission of the files that you don’t own, learn how to do that by following the steps that we have mentioned below. You may want to change the ownership and permission of the files you don’t own for multiple reasons. In general, you will want to do that when you have a shared computer, and you can’t access the files.
Step 1: Enter the Windows Key and E on the keyboard and then hit the Enter key. When the File Explorer opens, you need to look for the folder and files you want the ownership for and change the permission.
Step 2: Once you find them, right-click on the folder or file. Click on the Properties option, and the Properties window will open.
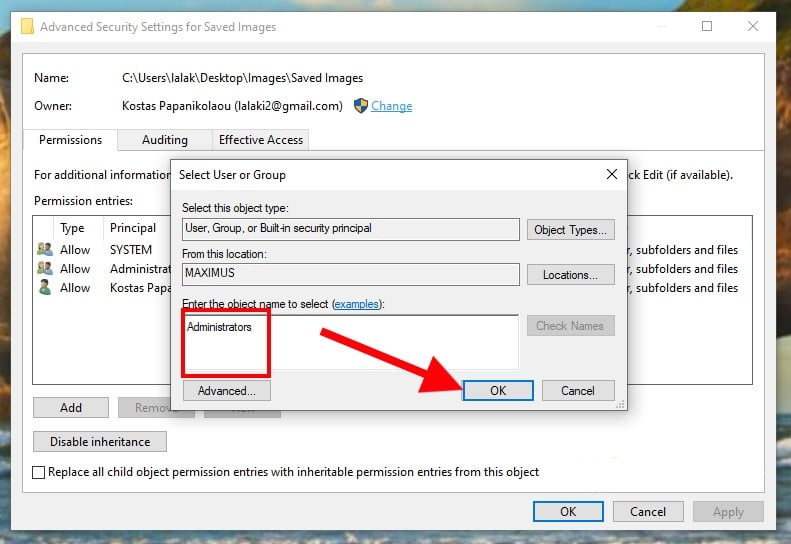
Step 3: Click on the Security tab and then hit the option that says Advanced. Once the Advanced Security Setting options, click on the Change option.
Step 4: When the dialogue box “Select User or Group” appears, you need to select the Advanced option. Look for the user account you want to change the ownership permission to.
Step 5: To find your name, click on the File Now option and select your user account. Click on the OK option, and finally, click on the Apply option to save the changes.
Set Permissions for Windows 10 Folder You Share
If you have a folder that you share with other users, you may want to set permissions for them as well. Well, don’t worry, we have got you covered. You can do that on your Windows 2003, 2008, XP, Vista, and 7 computers. What you can do is assign the file-sharing permission on a network or give permission on the PC itself. Once done, other users will be able to access it. Here’s what you need to do:
Set Permission on Local PC
Step 1: Launch your computer and locate the folder. Now, right-click on it.
Step 2: From the menu, you need to select the Properties option.
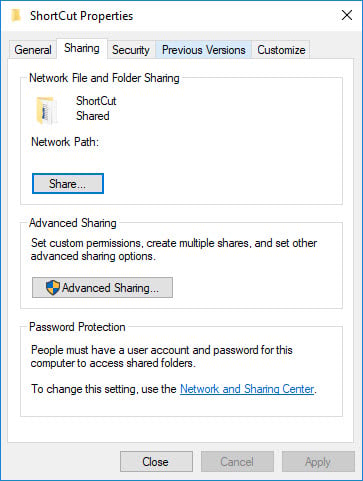
Step 3: When the Properties window opens, you need to select the Sharing tab.
Step 4: Now, select the User or group and then click on the edit option. Here, you can choose the group from your network; else, choose a Lan user.
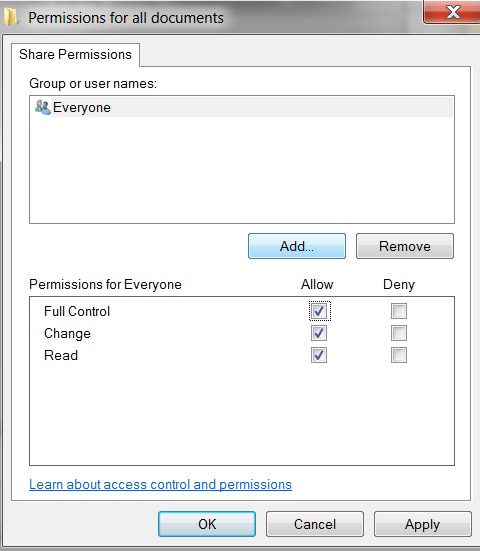
Step 5: Click on the Allow box and finally hit the Apply option followed by the OK option.
Set Permission with Third-party Tool
You can stick to the set permission on the local PC method, but if you want to make the process easy, you can download Shared Folder Protector by KakaSoft and easily set permission for the shared folder on a network.
Now, follow the steps below:
Step 1: Download Shared Folder Protector by KakaSoft and install it.
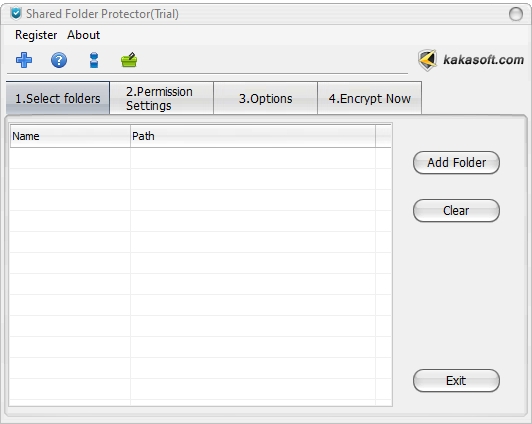
Step 2: Now, add the folder. There will be three options available:
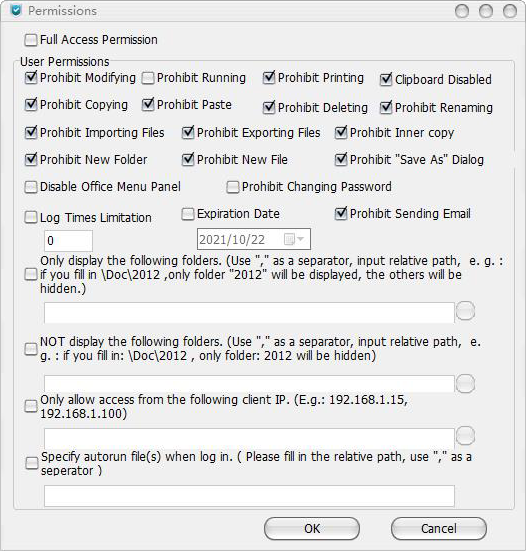
- Assign Shared Folder Permissions for User Groups: This one will let you set 15 types of permissions.
- Encrypt the Folder: You can add an administrator password. Once done, the user must enter the password to access the files on the network.
- Share the folder on the network for other users to access it.
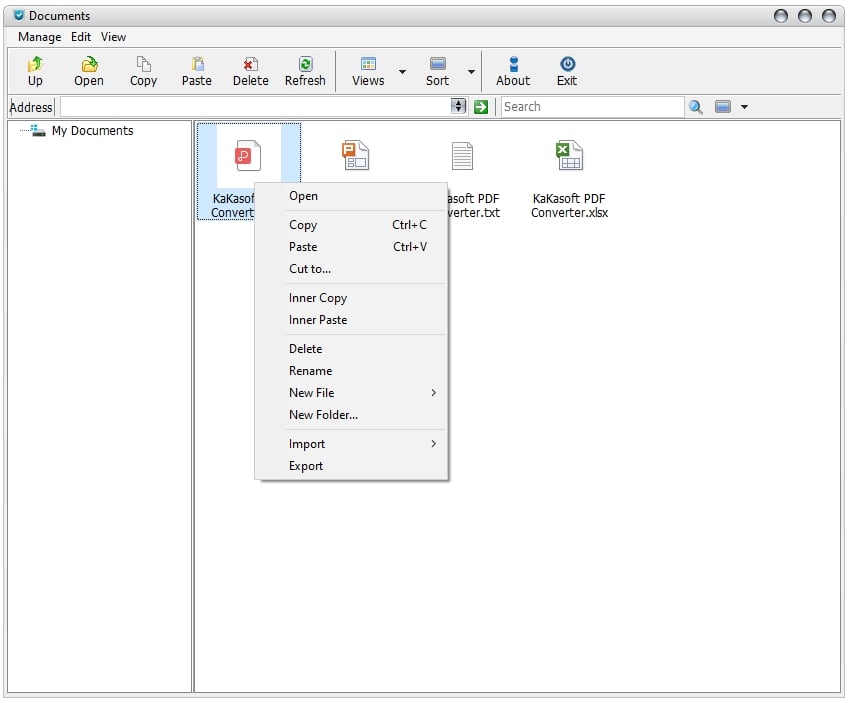
Step 3: Log in to the account with the different permissions

Just these two ways, and you can assign permission as per your requirements. Using Shared Folder Protector by KakaSoft is easy and straightforward.
Sum Up
Now you know about the different ways to assign file access permissions. You can try all of them, but to make things a bit better, it is recommended to use Shared Folder Protector by KakaSoft. This tool will not just let you share a file but protect it as well. To download, please visit the official website of KakaSoft’s Shared Folder Protector.