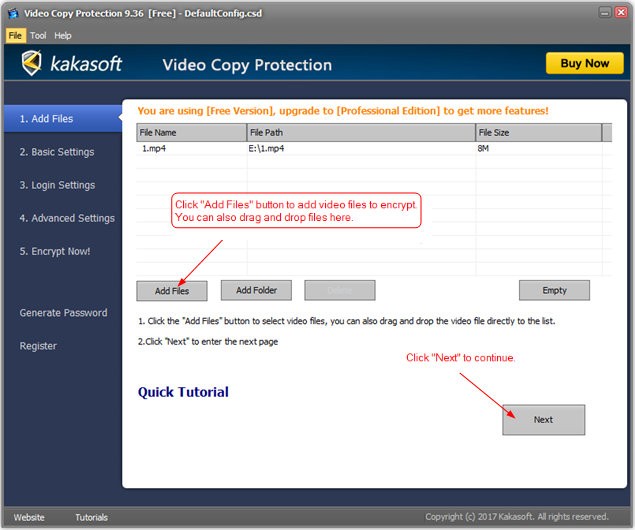
Step 1. Add Files
Click the “Add Files” button to add video files to encrypt. You can also drag and drop files here. Supported format: MP4、AVI、RMVB、WAV、MP3、MPG、MKV、WMV、FLV and so on.
Click the “Next” button to continue.
Step 2. Basic Settings
Encryption Key: Used as the key of the AES 256-bit encryption algorithm. It is recommended to set a sufficiently complex password to ensure the security of the video file.
Course Name: In order to help merchants and users know what course is playing, the course name will be shown in the login window.
When generating the video password, different course names will result in different play passwords. You will learn more when you see the “Generate Password” page.
Binding Mode:
1. Hardware binding: One key for one PC only. When users open the encrypted video, the machine code will be shown in the login window. Users should send the machine code to the merchants so that merchants could generate a password for the users.
2. One key for any PC: Generate a common password. You can play this video on any PC with this password. With this mode, all computers share the same machine code and the same video password.
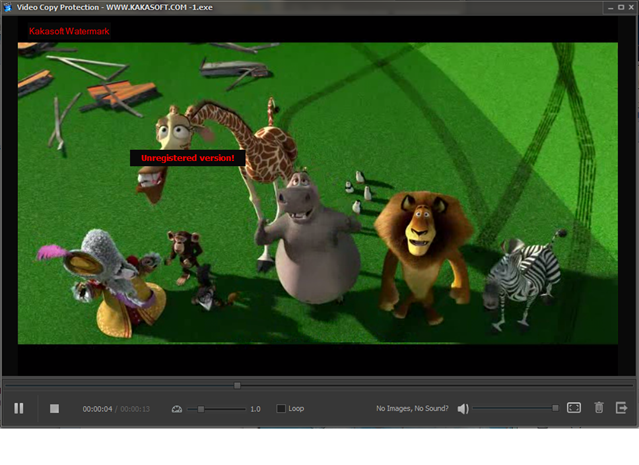
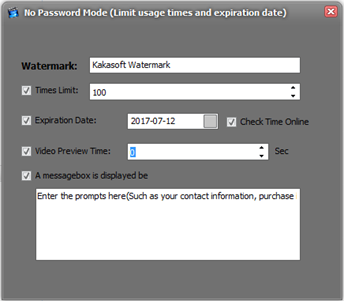
3. No password required: Run the video file directly. This is often used to make a trial playback file. In “Change Limitation”, you could set the expiration date, playtimes, and watermark for the video.

No Password Mode Settings:
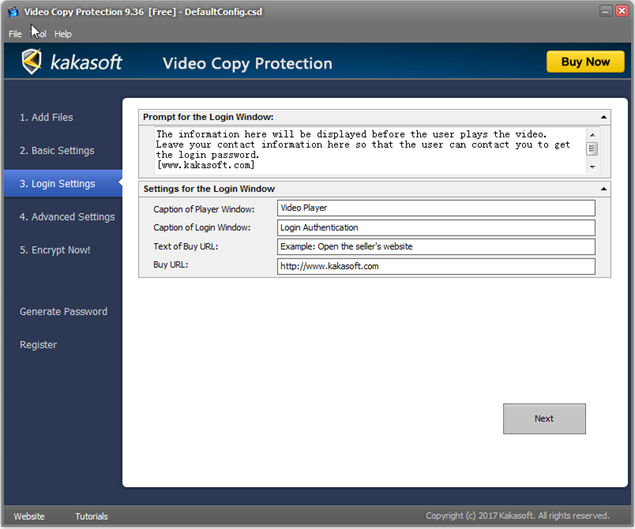
Step 3. Login Settings
Prompt for the login window: The information will be displayed before the user plays the video. You may leave your contact information so that users can contact you to buy your course and get the login password.
You could also customize the caption of the player window and login window.
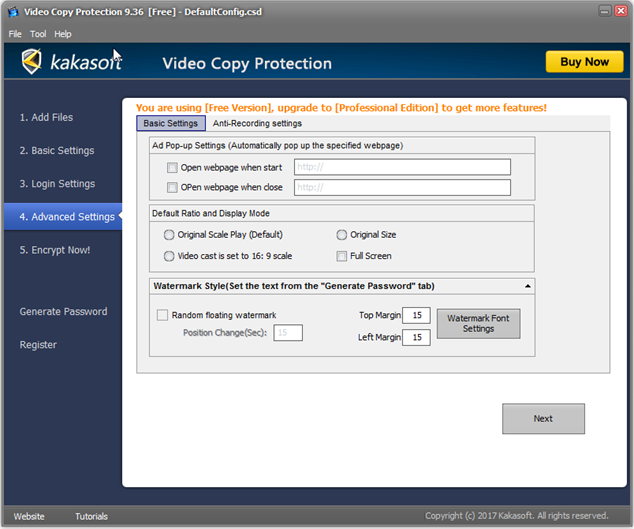
Step 4. Advanced Settings
1) Ad Pop-up settings: When users open/close the video, the program will pop up the specified webpage. You may write down the purchase link here.
Default Ratio and Display Mode: Set the default ratio and the size of the play window.
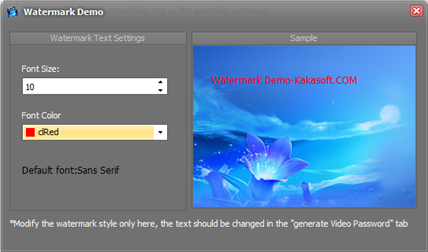
2) Watermark style: You could set the font style here. “Random floating watermark” means the position of the watermark will be changed every 10-30 sec. BTW, the watermark will only be displayed at the edge of the play window so as not to affect the user to watch the video.
Watermark Font Settings:
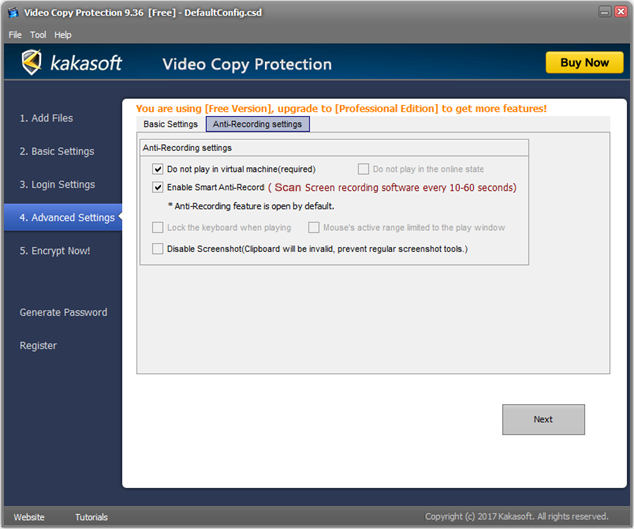
Anti-Recording settings:
3) Do not play in virtual machine(required): Prevents users from recording video through a virtual machine.
4) Enable Smart Anti-Recording: The program scans all the processes when the video is playing. If a suspicious process is found, the video will automatically stop playing. (Scan Screen recording software every 10-60 seconds).
5) Lock the keyboard when playing: Users cannot use the keyboard when playing the video.
6) Mouse’s active range limited to the play window: The mouse is limited to the play window.
7) Disable Screenshot(Clipboard will be invalid, prevent regular screenshot tools.): Users could not take a screenshot of the play window.
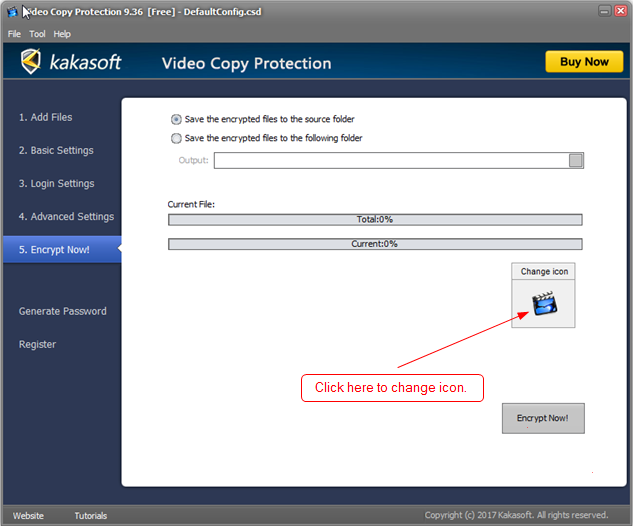
Step 5. Encrypt Now
Click the “Encrypt Now!” button to encrypt.
Change icon: The icon should be in “.ico” format. If you choose the “.exe” file, the program will exact the icon from the “.exe” file.
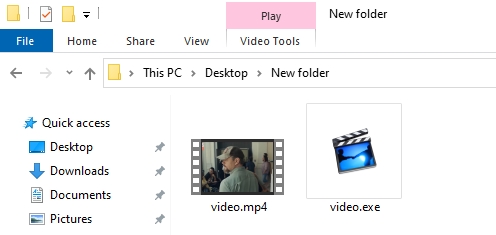
Step 6. Open encrypted video files
After the encryption, you can see the encrypted video files with the same name in the source directory. Double-click the encrypted video file to play.
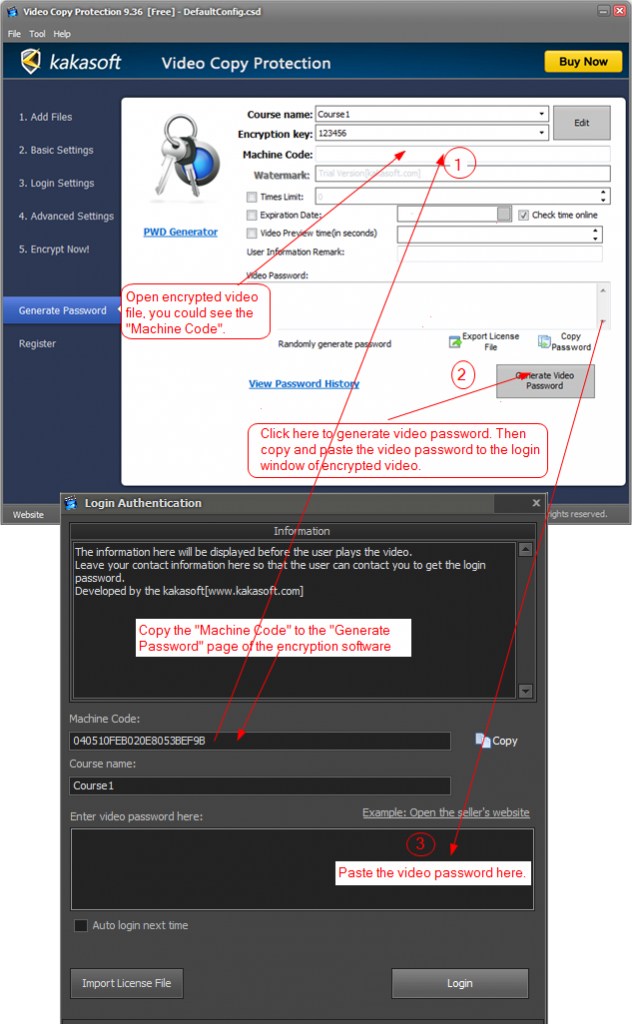
Step 7. Generate Video Password
1) Send the video files to your users. Open encrypted video file. Your users should send the machine code to you via email, skype, SMS…
2) When you get the machine code, Copy and paste the machine code to the “Generate Password” page of the encryption software window.
3) Click the “Generate Video Password”, the video password will be copied to clipboard automatically. Send the password back to your users.
Step 8. You could watch the video now!