USB Copy Protection is a reliable and portable program to encrypt and lock your files so that your files or materials of great value in the USB drives are protected from unauthorized access and copy.
Intellectual properties and presentation materials are the results of your intelligence. Therefore once they are copied or stolen by an unauthorized user, people will suffer from the possible consequence of illegal distribution and spreading of your files. Under the protection of the copy protection program, you can display any files and documents as you like and copy protect them from illegal activities. You will never worry about a data breach or file missing anymore.
Here is a quick look at how to use USB Copy Protection to copy-protect a wide range of major media formats in USB drives and make some settings as a new user.
Get USB Copy Protection here and learn to copy-protect a USB flash drive in 4 steps:
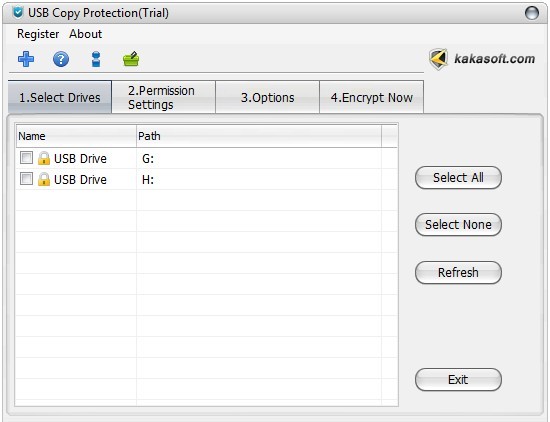
Step 1. Plug-in USB drive and run USB Copy Protection.
Download USB Copy Protection from our website and then run the Setup program. After the installation, open USB Copy Protection. Please make sure you’ve plugged your USB drive into the computer first. If the drives fail to appear in the list, please click the “Refresh” button.
Please make sure that you have transferred the files or documents into the USB flash drive before you start to copy-protect them.
Then select the disk you want to protect and lock.
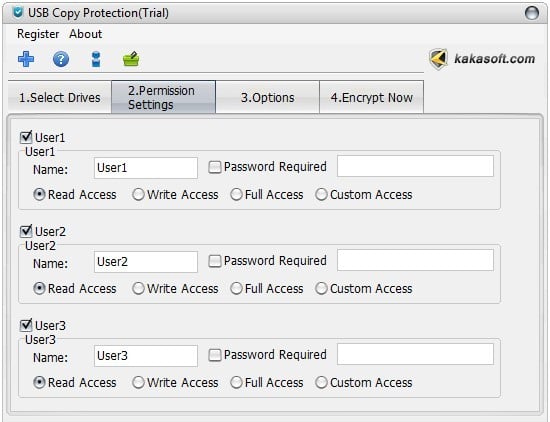
Step 2. Make settings about access permissions
You can customize access permissions in the “Permission Settings” window to ensure USB copy protection and assign specific access permissions to different users as the Administrator according to your own need.
Read access: Users can only open and view files on a USB drive.
Write access: Users can only open and import files but can’t copy or delete them.
Full access: Users have full access to files on the disk.
Custom access: You can assign specific access permissions to different users.
Note: You can modify the permissions with the Admin account under the protection of USB copy protection, and ONLY the Administrator has full access permission for files in the USB drive.
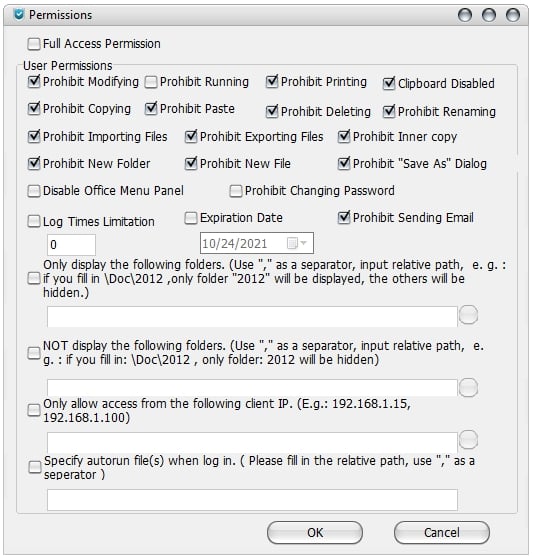
In the “Permissions” window, you can customize access permissions.
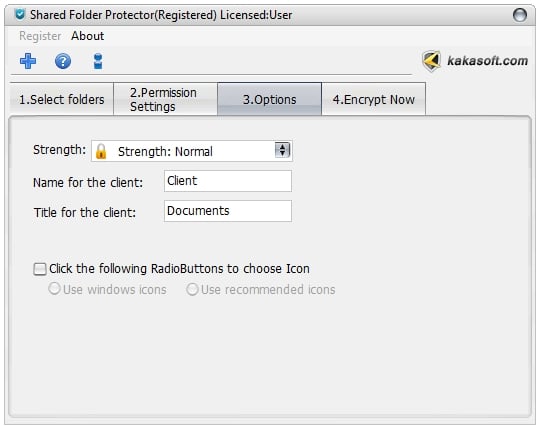
Step 3. Select an appropriate security strength
In the “Options” window, you can set suitable security strength for your locked files to control copy protection. We suggest you choose the “Normal” strength as the default setting if you use this program for the first time.
Then, you can make some personalized settings about the program for your own preference.
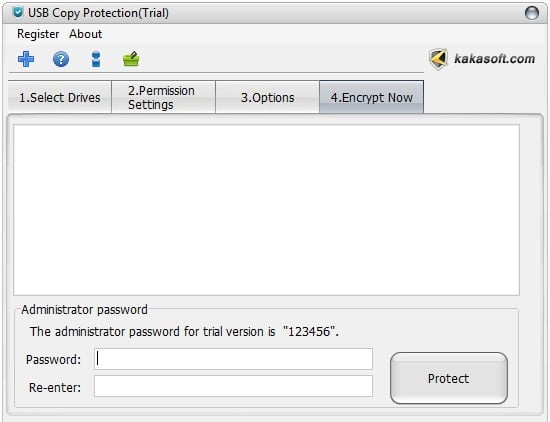
Step 4 Finish copy protection of files in your USB drive
Navigate to the “Encrypt Now” option, enter your administrator password, or if you are using the trial version, enter the default password “123456”.
Finally, click on the “Protect” button to finish USB copy protection now!
Tips about the Client
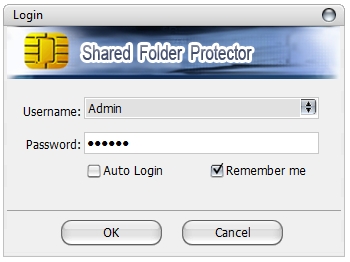
1. After you copy protect your USB drive, you find all files are hidden when you open the USB disk, so you need to run the client to get access to the USB flash drive.
Run “Client” in the copy-controlled USB drive, enter the password in the following Login window.
Note: The admin password for the trial version is “123456”.

2. Run the client, and here appears a login window. You can log in with Admin or user account, while only the Administrator has the full access permissions for files in the USB disk.
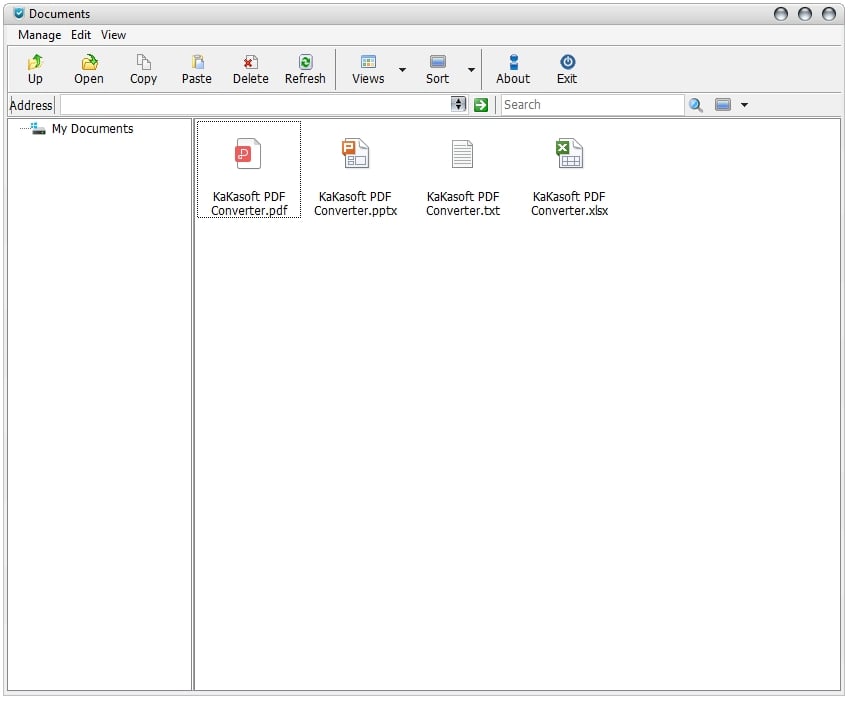
3. In the following “Documents” window, users only have the lowest access permission to the files, while the Administrator has full access. An administrator can assign different permissions to different users. You can modify permissions with the Admin account by Click Manage->Permission Settings, then modify the permissions for different users.
Here is the ending of the tutorial on USB Copy Protection. If you have any questions about this software, please feel free to contact us.