Shared Folder Protector is a professional shared folder encryption software, which can be used to password protect the shared folders in USB disk, portable hard drive, and LAN-sharing folders and provide you with the function of assigning access permissions to specific groups or individuals.
Step 1: Run the Program
Run the Shared Folder Protector, and then open the main application wizard. Click “Add Folder” and choose the folder that needs to be protected or directly drag the folder into the table below.
Step 2: Customize the Permission Settings
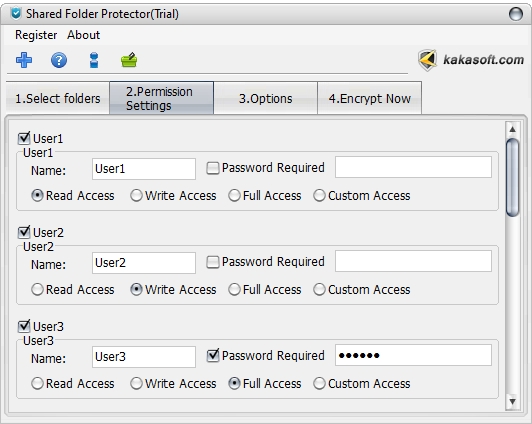
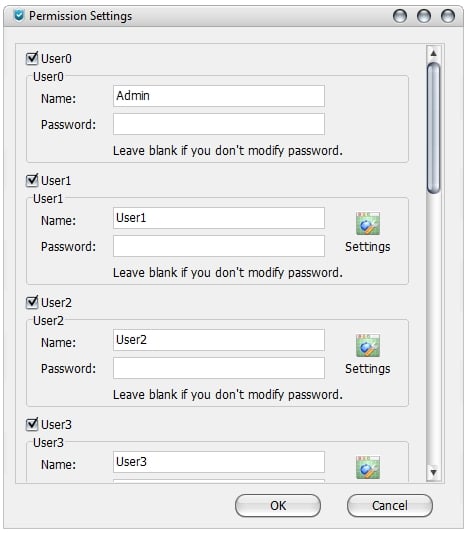
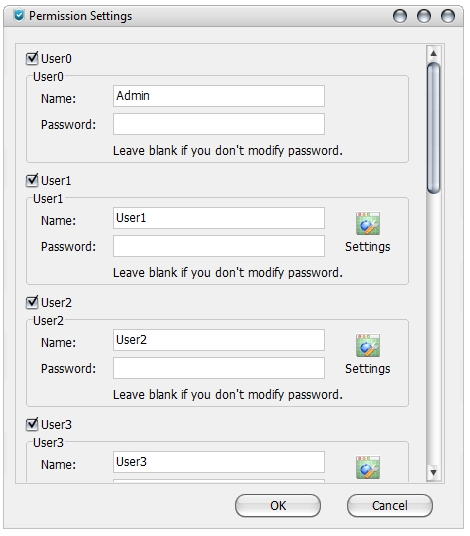
Click on the “Permission Settings” tab and begin to make settings about permission.
Here we take User 1 for example to make specific permission settings for a certain user. To tell different users apart, the Admin can name each of them and set different passwords to all users.
Read Access: The user can ONLY open and read all the protected files and cannot copy, delete, move, save as print the files or make any modification in this folder.
Write Access: The user can open and read all the protected files and import files to the folder but cannot copy, delete, save as and print files.
Full Access: The user has full access permissions on this folder and copy, delete, save, save as, or print files are not limited.
Custom Access: When you choose it, a variety of users permissions can be composed as you like. The user has full access to the files in the folder without any limit when choosing “Full Access Permission”.
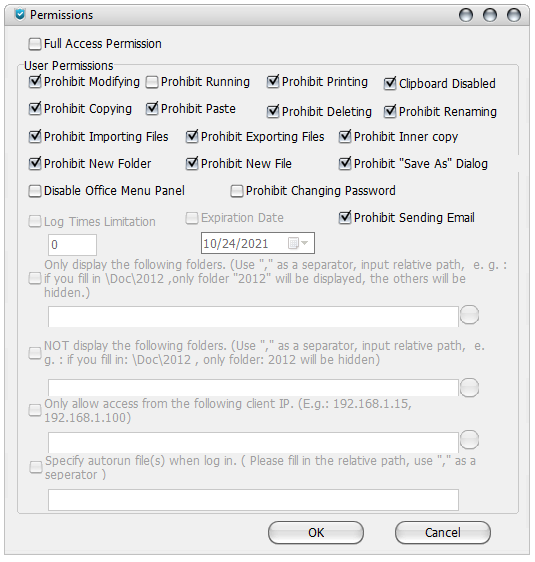
Click the “Custom Access” option, here pops up a “Permission” window.
User Permissions: select specific option of access permission from 15 kinds of access permissions (“Prohibit Modifying”, “Prohibit Running”, “Prohibit Printing”, “Clipboard Disabled”, “Prohibit Copying”, “Prohibit Paste”, “Prohibit Deleting”, “Prohibit Renaming”, “Prohibit Importing Files”, “Prohibit Exporting Files”, “Prohibit Inner Copy”, “Prohibit New Folder”, “Prohibit New File”, “Prohibit ‘Save As’ Dialog”) to disable certain access permission.
Restrict times for open and access the folder: check the “Log Times Limitation” option and then enter the number of times this user can access the folder.
Set expiry date: limit the time span for the user to access the folder.
Display/ Not display folder(s) :Only display the following folders. (Use “,” as a separator, input relative path, e. g. : if you fill in “\Doc\2012”, only folder “2012” will be displayed, the others will be hidden.)
NOT display the following folders. (Use “,” as a separator, input relative path, e. g. : if you fill in “\Doc\2012”, only folder “2012” will be hidden)
Step 3: Click the “Options” Tab for More Password Sharing Folder Settings
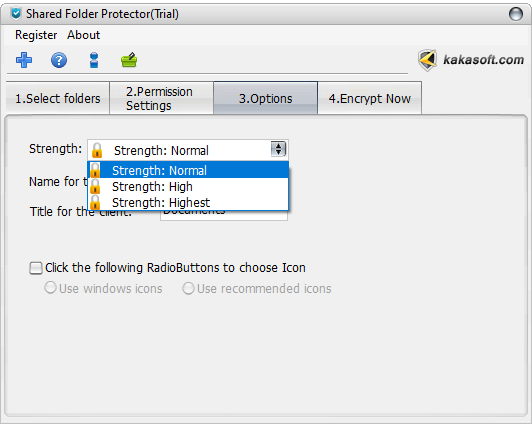
• Choose a proper security strength for your Shared Folder Protector. Options – Strength (three options)
Normal: (default option) protect files in large volume with the fastest speed, and it is suitable for new users without senior requirement.
High: protect files in medium size with fast speed, designed for users with high-security requirements.
Highest: protect highly confidential files in small size, slow but offer the strongest Shared Folder Protector.
• Other Options:
Name for the client: enter a name for the client.
Title for the client: enter a title for the client.
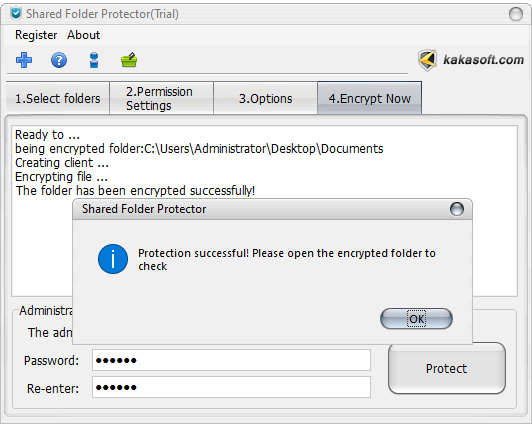
Step 4. Encrypt the Folder
Now Click “Encrypt Now”, input the Administrator Password: enter the administrator password in the password box and confirm it. Please notice that the administrator password for trail version is “123456”.
Click on the “Protect” button to protect the folder, the running log will display on the blank area of the window.
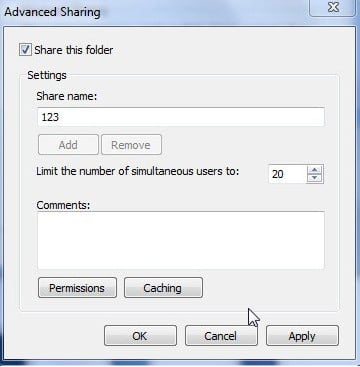
Step 5. Share the Protected Folder
First of all, set Advanced Sharing for the protected folder to make sure other computers can access it, which is essential for our software to assign the permissions. Right-click the protected folder, and then click the “properties”. Choose the “Sharing” tab, and set Advanced Sharing as follows.
Click the “Security” tab, choose “Everyone”, and then click the “Edit” button.
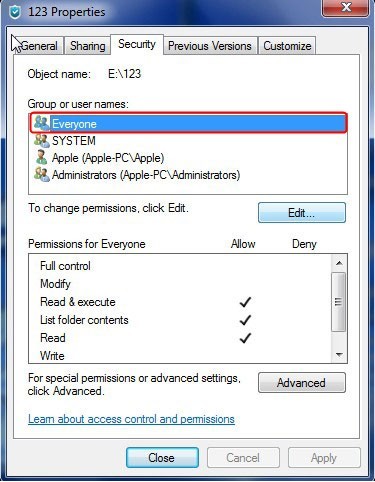
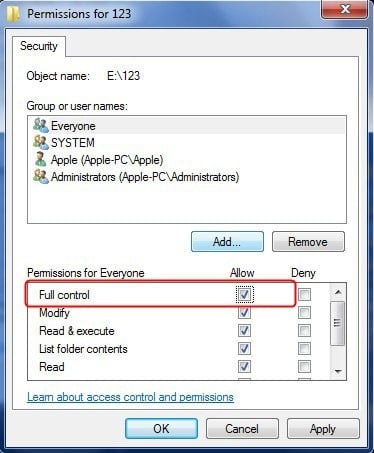
Choose “Everyone” in Group or user names, and click “Full control” to complete the permissions settings.
Step 6: Application on User’s Computer
Enter Network Neighborhood on the desktop, and double click the computer the protected folder is shared in. You will find the protected folder that is shared. Run it, and log in as User 1 without a password. User 1 is only allowed to read the folder. When you log in as User 2, you have the right to read and write the folder.

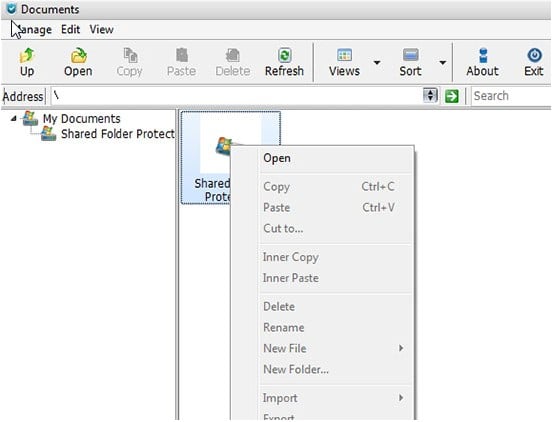
When you log in as User 2, you have the right to read and write the folder.
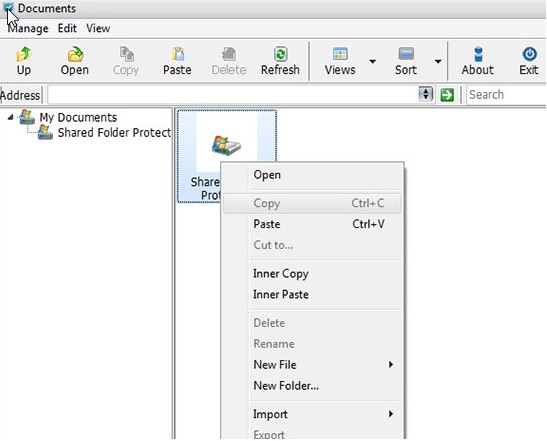
Log in with the username of Admin will provide you with full access.

Step 7: Assign the Access Permissions
Log in with a username, choose the “manage” tab, click” Privilege Manager” to set the different user’s right here.
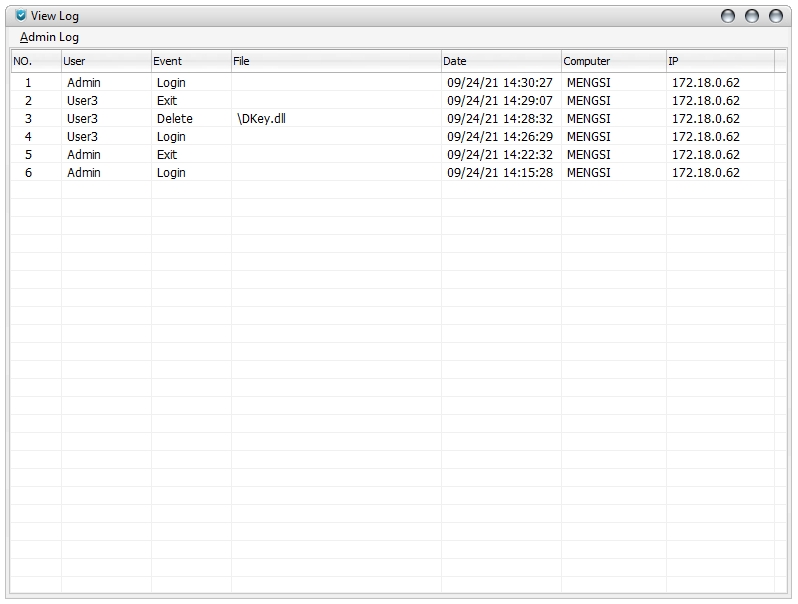
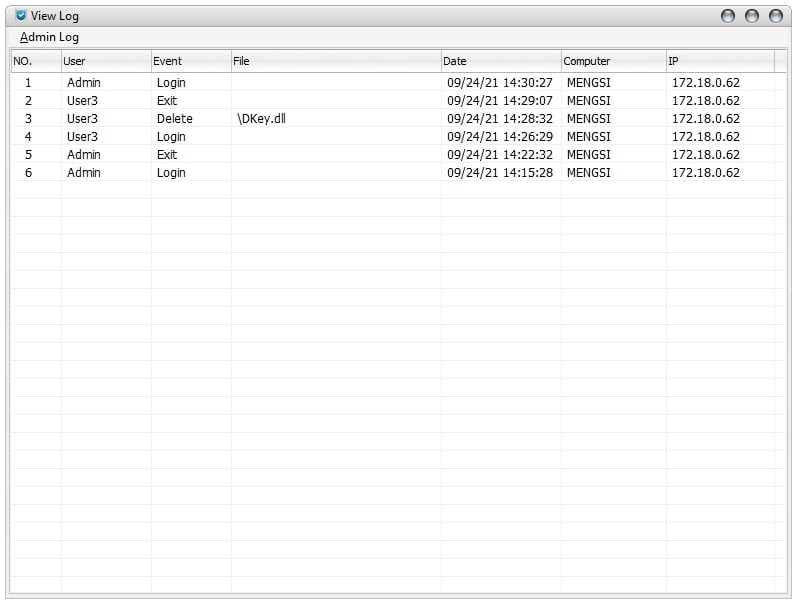
Step 8: Check the Visiting Record
Click “View Log”, the visiting records will be presented in the interface.
Step 9: Completely Unprotect the Protected Folder
Click “Complete Unprotect” to decrypt the folder(shown as following).

Step 10: Clear the Log and Reset the Password
Enter the protected folder as Admin, click “Manage”, and then choose “Privilege Manager” to set different passwords for different users in the blank.
Choose “Clear Log” in the “View Log” to clean all of the visiting records.